Solar Upgrades – Updated
We upgraded Golden Glow’s solar panels from 340 watts to 1,300 watts. It’s wonderful to live with this abundance, and all from mother nature. This upgrade was state of the art when we did it, but see the bottom of this post for the more recent upgrades by other Antares boats to higher wattage and it’s clear that today you can go even bigger!
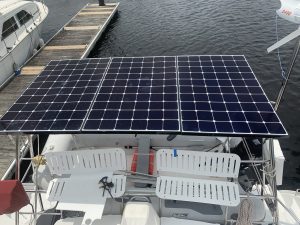
We love photovoltaic solar power. It is silent, pollution-free and makes no odor. We don’t need to feed them fuel other than the sunshine we sail under most of the time anyway. Our old solar (the basic that comes with an Antares 44i) consisted of just 420 watts – two BP Solar 80 watt panels on our davit arch and four BP Solar 45 watt panels on our hardtop bimini roof. Good but not great. We just completed upgrading our solar panels from 340 to 1,300 watts. With this upgrade, we now have four Panasonic 325 watt solar panels. Here are some of the details if anyone is interested.
Equipment
Our System
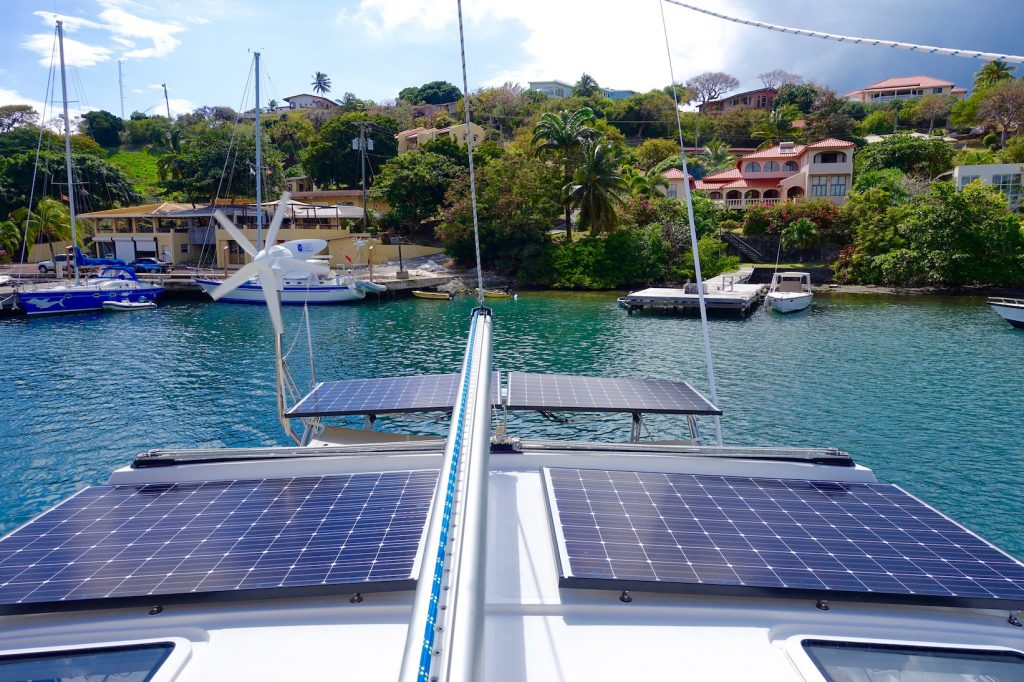
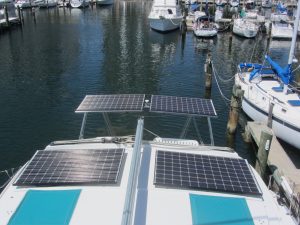
Our beautiful new solar array on Golden Glow – 1300 watts!
Solar is our favorite way to replenish the DC power in our boat’s battery system. Accompanying our solar power, we run a MasterVolt 12VDC/2500-100 120VAC with remote, a D400 wind generator and our batteries are four 6-volt Trojan L16Gs, for a 12VDC house bank (780AH / 20hr rating).
We wanted to go with rigid solar panels, sometimes called crystalline panels. They are composed of arrays of cells attached at the edges to form inflexible panels. These have a higher efficiency than the flexible models and last up to ten times longer, often carrying warranties of 20 years compared to only two to five years for flexible panels.
When you have a sailboat, space is a premium of course. That is made worse because your sails cast a lot of shade, which interferes with solar panels effectiveness. For us, this makes the hardtop over our cockpit and our davit arches the two best places for installing solar. Even when the mainsail is not up the hardtop has the boom casting possible shade on that space. The Davit arch is a somewhat better place, but even after removing our KVH SatPhone ball, we still have the D400 wind generator, RogueWave wifi antenna, Shakespeare SSB tall antenna and cellular signal booster antenna, so that space is shade-compromised too.
Why We Selected the Panasonic Panel
We chose Pansonic HIT panels – Panasonic 325W panels, model VBHN325SA16 – for a number of reasons. They are a very high efficiency panel. Panel efficiency is different from cell efficiency.
Panasonic’s HIT solar cells offer one of the highest conversion efficiencies in the world. The unique hybrid technology solar cells use a combination of monocrystalline and amorphous solar technologies to provide outstanding efficiency, with an excellent sensitivity to lower light levels. Panasonic supposedly holds the conversion efficiency record for both crystalline-based solar cells and modules. Panasonic and SunPower go back and forth for this record – compete and knock yourselves out to improve choices for all of us we say!
The Panasonics also came in a unique dimensions that best fit the available spaces on our Antares catamaran (most other panels in the 300+ watt output are longer and narrower). Last but not least, their HIT – heterojunction – hybrid cells, which are composed of mono-crystalline and amorphous silicon layers will give us the best performance on our sailboat where our panels will be exposed to partial shading. Amorphous silicon layers in the cells prevent recombinations of electrons and minimize the power loss resulting in the most efficient panel we could find in this size and power output, especially in semi-shaded situations.
Shading and Why Panasonic Panels Seemed Best for Sailboat Application
HIT (Heterojunction with Intrinsic Thin layer) Solar Cells
HIT solar cell has become the subject of intense research within the photovoltaic research community, due to its low process temperature in comparison with crystalline silicon (c-Si) solar cell and comparatively high efficiency (η). This solar cell structure uses thin intrinsic amorphous silicon layers as a surface passivator and also as a buffer layer at the top and bottom surfaces of n-type crystalline silicon (c-Si) wafer. A highly doped n+-type bottom layer acts as a back surface field, while a thin p-type a-Si top layer is used as an emitter. Sanyo Electric Company, a Japan-based company and part of Panasonic, invented the crystalline silicon wafer–based hetero-junction solar cell concept.
Panasonic HIT
The photovoltaic module HIT solar cell is the original hetero-junction type, comprising of amorphous and monocrystalline silicon layers. The presence of amorphous layers in the cell avoids electron recombination, reducing the associated power loss and deliveri
ng industry-leading performance. The unique structure of Panasonic HIT allows it to maintain high conversion efficiency and performance even at hot temperatures, generating more energy throughout the day.
Key Features of Panasonic HIT Panels
The key features of the Panasonic HIT are as follows:
- High temperature stability
- High efficiency, roughly 27% more power when compared to 260 W competitor panels
- Maximum use of available roof space
- Generates higher power for the same system size
- More power per area
- RoHS complaint
- PID resistant
2016_General_Installation_Manual_VBHNxxxSJ25_SJ40_SJ47_EN
2016_HIT_Leaflet_EN_A4 n325330-specsheet-revised-final-2-2-16-351965
Importing the Solar Panels
The Panasonic HIT panels were not available anywhere in the Caribbean or Panama, and most retailers would only sell them in bundles of a hundred or more. But we found one e-tailer in Massachusetts called AltEStore that was willing to sell us just four. AltEStore trucked to Tropical shipping in Miami, from where Tropical ocean freighted to Grenada. We used a broker to accomplish importing them as boat parts for a yacht in transit to pay only a 2.5% duty.
The procuring process was long and arduous due to one panel being broken when it reached us. AltEStore was excellent in standing by their product because the packaging wasn’t sturdy enough and replaced it very promptly. Still it took weeks to receive the replacement because of the time getting the panel from Massachusetts to Miami, the 8 days for ocean freight delivery, and the additional 4-5 days for the container to be unloaded and unpacked and to get clearance through Grenadian customs.
MPPT Controllers
The Panasonic HIT panels require an MPPT controller to work. In 2014 we upgraded the old solar controller to an MPPT system by adding four of the Blue Sky MPPT 2512i controller connected to a Blue Sky IPN pro remote. We used these over the last couple years one each on the 85W and one for the four 45 watt panels and fortunately these will work for the new panels too.
The controllers are mounted under our nav table, just above the mastervolt and 12VDC bus. Each is connected to a 30amp fuse prior to the house bank. The remote controller is mounted just below the mastervolt remote controller. (Rand moved the salon air conditioner panel lower).
The 2512i controllers are rated for 25amps. We are not sure if the new solar panels will shorten the life of the 2512i as the rated wattage 340W is so close to the 325W of the Panasonic. But so far so good.
Controller Cooling
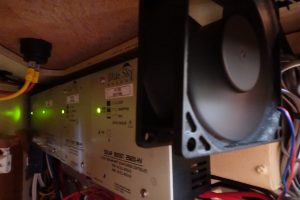
the fan cooling MPPT controllers
The 2512i controllers run pretty hot during power generation in noonday sun. We installed a fan to blow across controller faces to help cool them. For dusk to dawn switching of the fan, we installed this photo sensitive on/off switch.
Performance
The spec says they generate ~70 volts up to 6 amps. With unshaded noon sun in Grenada we are seeing ~66 volts at the panel and the remote controller show about ~60+VDC 3-4amps. Each panel is producing 10-15 amps at 12VDC when not shaded in midday Grenada sun. One of our controllers has failed (or was DOA) so with three panels working we have seen up to 45amps at one time. It appears that the Blue Sky controllers are pulsing somewhat so there is quite some fluctuation in the real ampera
ge. The metered amperage on the remote is comparatively steady.
Installation:
Removing the Old Solar Set Up
We removed all the existing panels / controllers / wiring /diodes to replaced or augmented them with new. To remove the hard top panels I used Anti-Bond 2015 to soften the 5200 used to affix them. There were no bolts attaching the hard top panels. The arch panels were simple to remove. Replacing the old wiring on the hardtop is a bit of a pain due to the tightness of the support tube that the wires run through. I ran a pull-line and replaced old wire with two new 2-conductor 10AWG Ancor wires. For me, pulling the line down was much easier than pulling up through the stainless hardtop support. Most of the tightness seems to be in a slight wiggle from where the lines run at the salon ceiling level and the tight bend at the top of the pipe. Line lube helped some as well as a few deep breaths. While there, you might want to run an additional wire for red/white color cockpit lights for night or night t
ime security light for inside cockpit. We also replaced the single arch wire with two new 10AWG 2 conductor wires running the complete length to under the nav table (close to the house bank).
Wire
Wiring is 10AWG marine grade two conductor Ancor with a dedicated line for each panel run from panel to controllers and Ancor 1/0 AWG from the controller fuse panel to the 12VDC bus. The former runs are 30-50 ft and the later is 18”. Currently the system is running on a single shunt (both the master volt and the BlueSky use the same rated 500A/50mV shunt) there is some variance on the amps between the mastervolt and Blue Sky remote so we will be adding a second shunt in series to see if that minimizes the difference. TBD.
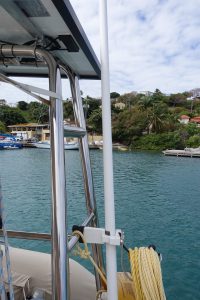
SSB Antenna with mounting extension
Install Considerations
The Panasonic panels are approximately 62.6”x 41.5” so they just fit on the arch and on the hard top of the Antares Catamaran. We moved the KVH Satellite Tracphone dome and mounted the SSB Shakespeare antenna out an additional 2.5 inches from the mid arch connecting point to fit the panels on the arch. Ultimately the Sat dome will sit aft of the panels. Our wireless antenna and cell repeater are now mounted on the starboard side of the panel: on the same side as our D400 wind gen so they all shade that single panel when the sun is over the starboard side.
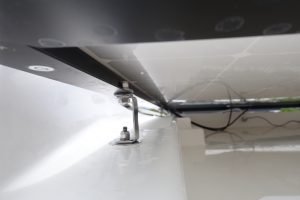
As raw materials are scarce in Grenada, Rand did the aft arch mounts with angled aluminum and for the hard top he bent stainless back plates from U bolts. All told the cost was less than $200 for materials. 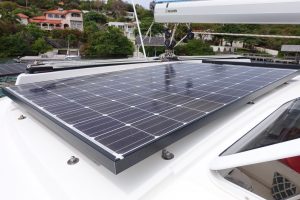
For the hardtop installation, we originally thought we would use these stainless toggle bolts to bolt the hardtop panels without having to drill all the way through to the cockpit. But as fate would have it, once Rand drilled into the top, there wasn’t sufficient room between the top two layers of fiberglass to place them. Throughout the top, there appeared to be either two or three layers before the actual ceiling of the cockpit, totaling 3-4 inches, so he used quarter-inch threaded stainless rod and screwed the rods through all the layers using 5200 on the threads. Then he attached a 2-inch washer with 4200 over the fiberglass further sealing the top where the rod was threaded through the hardtop roof. Note: Be sure to countersink the gelcoat all the way to the fiberglass or it will chip.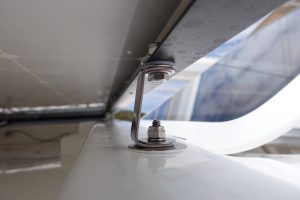
Results
Until our replacement fourth controller arrives, we are running just three controllers working only three panels. With just three panels, we are already seeing 20amps at 12VDC with 10AM sun under a clear sky. Power spikes to 45amps midday with peak sun. We expect we will see a 24-30% increase once the 4th controller is installed.
We are typically seeing morning voltages of 12.1-12.3 (50-65% charged) with late afternoon voltages of 13.4 to 14+ on sunny days WITHOUT the D400 wind gen. These surface charges settle into the 12.7/12.8 full charge near dark on most days. I expect I may still need to run the GENSET to force a float condition if the weekly max does not find 14.8, but yesterday we came back from afternoon tennis and pool time to find the system in float.
I will be playing with equalization and water making from from the inverter via solar/wind once we replace our install with the replacement solar controller, which is on its way from Amazon.
How Some Other Antares Owners Have Upgraded Their Solar in Recent Years:
Leap of Faith added 1,800 watts. Two 335 sunpower rigid panels on the Bimini and three 365watt LG neon R2 panels across the rear arch.
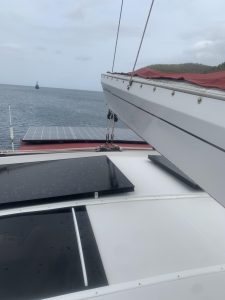
Kailani added four 450 watt panels with a gap in the middle so they can see the mainsail when they are operating the electric winch. The white area in the photo is a see-through cover.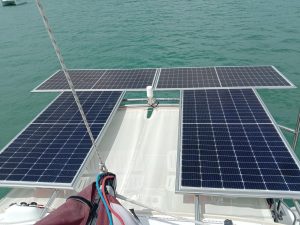
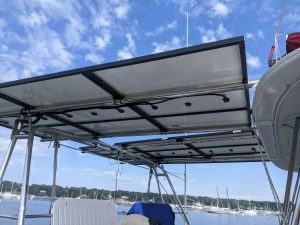
Linnaea added a whopping 2,200 watts with six 370 watt REC Alpha panels. That doesn’t include the old solar on their bimini roof, which they plan to replace next.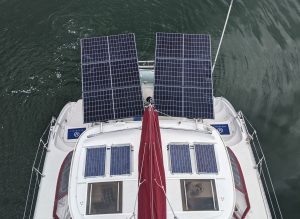
Their impressive installation was unique because they wanted a structure strong enough for their kids to be able to swing from. That’s why they added 2″ stainless thin wall tubing) spanning the 8 feet between the arch and the bimini. 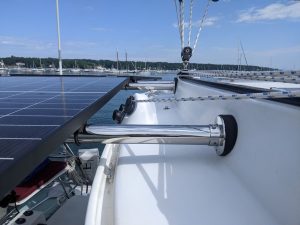
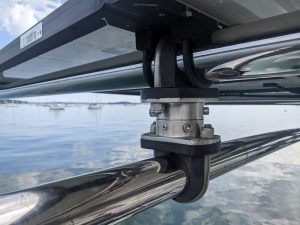
The coupling to the bimini has a 75A Shore hardness chunk of Neoprene to give a little compliance if the distance between arch and bimini changes, and they added 60A Shore rubber mounts between the stainless tubes and the solar panel frames to help reduce load on the panels as the racking twists, and to provide galvanic isolation between the stainless and aluminum.
The 2″ stainless tubes are cantilevered 3.5 feet beyond the arch. Their overhang also provides weather protection for their dinghy. And they plan to add a removable Strataglass strip to cover the gap between the panels, while still allowing you to see the sails overhead.
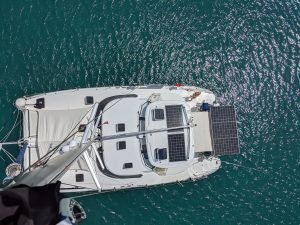
Mira opted for all rigid panels – five LG Neon 2 at 365 watts apiece for a total of 1,825 watts

Fantastic, Rand! Thanks for posting. We will definitely study this.